

Part 1 – Add-on Setup
Notes on this documentation:
- It is assumed that you already have an Invoices table (referred to below as “Invoices”) linked to an Invoice Lines table (referred to below as “Lines”).
- If you manage multiple due dates in a separate table, this table will be referred to below as “Due Dates”.
- Make sure you are running FileMaker Pro version 21 (2024) or later. You can always download the latest version here: for macOS, for Windows.
- Download the Add-on. Place a free order on the 1-more-thing website, then click the link received by email to install the Add-on.
- Quit and restart FileMaker Pro.
- Duplicate your solution to keep a backup (just in case).
- In your solution, open an invoice layout (the form where you edit invoices, not a print layout).
- Switch to Layout mode.
- Install the Add-on (click “+” in the Add-ons panel on the left). Select the Add-on you just downloaded (“ABCinvoice”).
- Still in Layout mode, drag the Add-on onto your invoice layout.
- Known potential issue: with older files, when dragging the Add-on, you may see a message saying that no primary key could be detected.
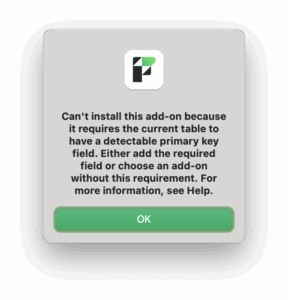
Solution: temporarily add a field (type: Text) to your Invoices table defined as an auto-enter serial number with a “unique” validation criteria. Validate and drag the Add-on again. In the next step (relationship graph), replace the temporary field with your real primary key, then delete the temporary one. - Check in the relationship graph that links have been created between your Invoices table and the tables ABCinvoice_Attachment and ABCinvoice_LegalLiteral. If not, create them manually (link your Invoices table’s primary key to ABCinvoice_Attachment::idInvoice and ABCinvoice_LegalLiteral::idInvoice).
- Potential known issue: FileMaker automatically detects what looks like a primary key, but it can sometimes get the field wrong! Make sure that the correct field is used in the relationships. Furthermore, if the recognised primary key in your invoice table is of the Number type, FileMaker will take the initiative to change the type of the fields ABCinvoice_Attachment::idInvoice and ABCinvoice_LegalLiteral::idInvoice to Number. Please reset them to Text.
- In the relationship options, disable the creation of related records from your Invoices table (you can keep the delete option, which makes sense).
- Field configuration
- Copy all fields from the table ABCinvoice_invoiceExample into your Invoices table.
- Recommended: change the storage options of container fields to external storage.
- Do the same for the container field in the ABCinvoice_Attachment table (the “file” field).
- Copy the field from ABCinvoice_invoiceLineExample into your Lines table.
- Due Dates: if you manage multiple due dates, copy the field from ABCinvoice_InvoiceDueDateExample into your Due Dates table.
- Edit the fields ABCinvoice_JSONrepresentation_{table} in the Invoices, Lines, and (if applicable) Due Dates tables.
- Dates must be passed as numbers to ensure compatibility across all systems (client/server). For example:
GetAsNumber ( Invoices::InvoiceDate ) - Related data arrays must be passed like this:
; [ "invoiceLinesAttributes" ; JSONMakeArray ( List ( Lines::ΩABCinvoiceJSONrepresentation_invoiceLine ) ; ¶ ; JSONObject ) ; JSONArray ]
- Dates must be passed as numbers to ensure compatibility across all systems (client/server). For example:
- For the due date(s):
- If you do not manage multiple due dates, use the parameter dueDateAsNumber.
- If you manage them in a separate table, use the parameter shown in the example.
- Regarding customer identification, a list of tax identification codes (TIN schemes) is available here.
- Configure the ABCinvoice_Config script:
- Define the $config variable, specifying your Invoices table’s primary key and pointing to the fields you just added.
- Set a working layout (in the “Go to Layout” script step). This layout must represent the table occurrence of your Invoices table corresponding to the fields defined in $config. It is recommended to use a blank layout, in Form view, with no script triggers.
- Settings
- Create an account on ABCinvoice.eu and obtain an API key.
- From the interface (the Add-on you placed on the layout), enter the API key and select your country (the country from which invoices will be issued). Update the legal literals library by clicking Update Legal Literals.
- Cleanup
- Delete unused elements that were only provided to assist with configuration: the tables containing the word “Example” and their table occurrences (
ABCinvoice_InvoiceExample,ABCinvoice_InvoiceLineExample,ABCinvoice_DueDateExample).
- Delete unused elements that were only provided to assist with configuration: the tables containing the word “Example” and their table occurrences (